
How to connect Stripe and start taking card payments
A step-by-step walkthrough of connecting Stripe to your shed — what you'll need, what Stripe asks for, and how to know you're ready to take orders.
5 min readUpdated October 2026Your shed can't take online orders until Stripe is connected. Stripe is the payments company behind MyCakeShed checkout: customers pay by card when they order, and Stripe pays the money out to your bank. It takes about ten minutes, and you only ever do it once.
Before you start, have these to hand
- Your email address and mobile phone (Stripe texts you a code to verify it).
- Your full name, date of birth and home address.
- Your bank's sort code and account number — this is where your payouts go.
- Photo ID (passport or driving licence), in case Stripe asks to verify your identity.
- If you trade as a limited company rather than a sole trader, your company registration number.
Most home bakers sign up as an individual or sole trader. You don't need a limited company or a separate business bank account to get started — though a separate account does make bookkeeping and your tax return easier.
Step 1: Open your payment settings
- Sign in to your baker dashboard.
- Click Settings in the left-hand menu, then the "Payments & tax" tab.
- Find the "Stripe payments and CakeShed fees" panel. Until you're connected, it shows a "Setup required" badge.
- Click "Set up payments". You'll be taken to Stripe's secure sign-up page.
Step 2: Fill in your details with Stripe
Everything from here happens on Stripe's own site, so MyCakeShed never sees your bank or ID details. Your shed's name and shop link are already filled in for you. Stripe then walks you through:
- Creating your Stripe login (or signing in, if you already have a Stripe account) and verifying your phone number.
- Choosing your business type — for most bakers that's Individual / sole trader.
- Your personal details: name, date of birth and home address.
- Your business details: the industry (food and baked goods) and a short description. Your shop link is used as your website.
- Your bank account for payouts.
- Reviewing everything and clicking Submit.
If you need to stop halfway — to dig out your bank details, say — just close the page. Your progress is saved, and the button in Settings changes to "Continue setup" so you can pick up where you left off.
Step 3: Check you're ready for payments
When you finish, Stripe sends you back to your Payments & tax settings. Stripe usually verifies new accounts within minutes, though it can occasionally take a day or two if it needs to check a document. Once everything's approved, the badge turns green:
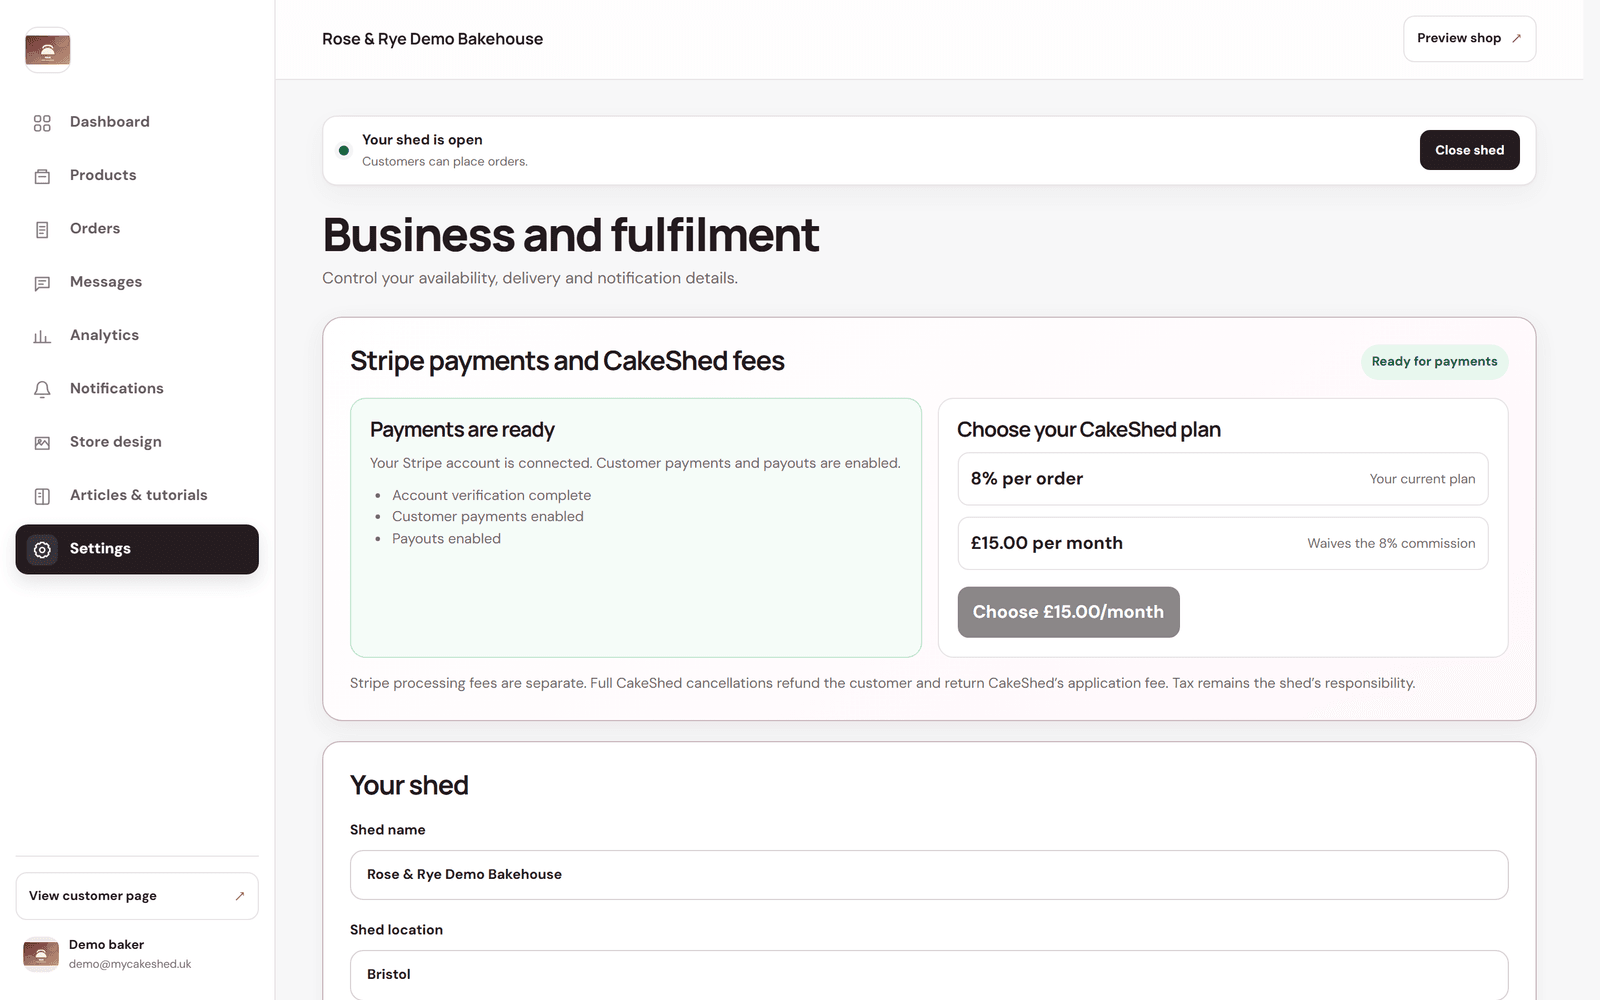
- Account verification complete — Stripe has confirmed who you are.
- Customer payments enabled — customers can now check out on your storefront.
- Payouts enabled — money can be sent to your bank.
Until then, your storefront still shows your menu but displays "Not accepting orders", so nobody can try to pay before you're set up.
When do I get paid?
Customer payments go straight into your own Stripe account, and Stripe pays them into your bank on a rolling schedule. New accounts usually wait a little longer for the very first payout; after that, payouts typically arrive a few working days after each sale. You can see every payment and payout in your Stripe dashboard.
What does it cost?
Connecting Stripe is free. Stripe takes a small card processing fee from each payment, and MyCakeShed takes either a small percentage per order (pay-as-you-go) or a flat monthly fee that waives the per-order commission — you choose in the same panel. Analytics shows exactly how each sale splits under “Where the money goes”.
If something goes wrong
- Stuck on "Setup required"? Click "Continue setup" — Stripe will show you exactly which details are still missing.
- Stripe asked for more documents? Upload them in your Stripe dashboard; your shed updates automatically once they're accepted.
- Payouts not enabled? Double-check your sort code and account number in Stripe.
- Still stuck? Message us from your dashboard and we'll help you get it sorted.
Once you're showing “Ready for payments”, share your shop link and let your first customer try it — or ask a friend to place a small order so you can see exactly what your customers experience.